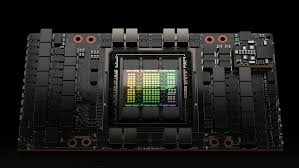
Due to the fact that Linux runs 91.5% of supercomputers and is used frequently for professional tasks,[2] Artificial Intelligence (AI) is used widely on Linux for not only proprietary applications and usage, but also is heavily used for FLOSS applications of such technologies. Such examples include voice changers, image generators, Large Language Models (LLMs), and much more. If you are feeling frustrated or confused, this is a guide on how to not only yield results on NVIDIA cards - commonly used in the AI industry - but also on Advanced Micro Devices' (AMD) ROCm-capable Graphics Processing Units (GPU). Both drivers have the capability to run AI applications, yet also depends on the developers' and project's support for such technologies.
Ana/Miniconda Setup
While not required, it is heavily recommended to use conda to manage Python libraries required by various machine learning and artificial intelligence projects from places like GitHub and Hugging Face. Conda exists as a distinct virtual environment separate from the native distribution's Python packages. Users may specify version number and install additional plugins as well as packages within an environment utilizing conda.
It is recommended to read the Linux setup for Miniconda on their official website. The install for Miniconda is very unorthodox compared to installing other packages on a Linux system - be mindful.
Stable Diffusion Setup - WebUI (Forge)

According to the project's main page, the Stable Diffusion WebUI is a "web interface for Stable Diffusion" in order to generate images using prompts or image-to-image generation.[3] Stable Diffusion WebUI Forge is a version of Stable Diffusion WebUI that offers additional support for FLUX.1 [dev] and FLUX.1 [schnell] models. For some users, using the Forge version may result in greater stability using FLUX as opposed to the vanilla version.
Simply clone the Forge repository:
git clone https://github.com/lllyasviel/stable-diffusion-webui-forge/issues
...install required pip packages:
pip3 install -r requirements.txt
...and run the program:
python3 launch.py
Extra notes
Run options/flags
It is advisory to set additional launch parameters for better performance, e.g. using xformers for optimization or to specify a certain directory where models are stored. You can place these in a separate xxx.sh file to run instead of having to copy-and-paste large strings - here is an example:
python3 launch.py --listen --xformers --enable-insecure-extension-access --cuda-malloc --port 7860 --vae-dir=/run/media/jennaannilyn/Pikmin3/models/vae --ckpt-dir=/run/media/jennaannilyn/Pikmin3/AI/ --lora-dir=/run/media/jennaannilyn/Pikmin3/AI/models/loras --no-half-vae
Installing and using Ollama on Linux

According to Ollama's main page, Ollama is used to run open-source/open-weight, locally hosted Large Language Models.
w-okada's voice changer

According to w-okada's documentation in English, and as implied by the name of the repository, it is an AI-powered "voice changer" tool.[5] There are numerous uses for this: for simple enjoyment, for music covers, and for anonymity, w-okada as a voice changer is an extremely useful utility.
NVIDIA setup
Setup for NVIDIA cards is particularly straightforward, especially on Arch Linux where drivers are equally as abundant as they are functionally sufficient for this application. If you are considering investing in or using an existing NVIDIA card:
| 4 GB VRAM cards or LESS | You will likely struggle with using w-okada at times below 4 GB (2 GB, 1 GB, etc.) in hearing glitches and a lot of slowness in transmission of your voice - input - and the new voice - output.
|
|---|---|
| 8 GB VRAM EXACT | More than often, 8 GB as an extra or dual GPU is sufficient in order to get satisfactory results at reasonable speeds (100-250 ms, average). (SEMI-TESTED)
|
| 12 GB or MORE | Considering the general trend of artificial intelligence, 12 GB of VRAM is ideal. (TESTED - GIGABYTE GeForce RTX 3060 12 GB)
12 GB of VRAM should handle heavier workloads and other programs simultaneously well, and beyond is sufficient for best performance.
|
NVIDIA cards generally seem to get the same performance as they do on Windows for Linux voicechanger users.
Setup
Clone the voicechanger repository:
git clone https://github.com/w-okada/voice-changer
(Using Conda): Assuming you are in a blank base environment, create a new environment running Python 3.10.6, ideally (this is because of compatibility with w-okada):
conda create --name voicechanger --python=3.10.6
Make sure you have installed NVIDIA drivers for your specific distribution. Consult their respective wiki pages for more info. At this point, you want to activate your voicechanger environment:
conda activate voicechanger
...and cd into the server directory, assuming you are in the directory of which you have cloned the repository into:
cd voice-changer/server
Your first run will require you to install the requirements file:
pip install -r requirements.txt
After installing, run MMVCServerSIO.py:
python3 MMVCServerSIO.py
The Deiteris Fork
Some users may prefer Deiteris's version, which may offer extra precision and performance for more advanced users. The process is almost identical, except that you must clone his fork:
git clone https://github.com/deiteris/voice-changer
...while consequently running a different Python command:
python3 ./main.py
References
- ↑ https://developer.nvidia.com/blog/nvidia-hopper-architecture-in-depth/
- ↑ Elad, Barry. Linux Statistics 2024 by Market Share, Usage Data, Number Of Users and Facts.[1]
- ↑ AUTOMATIC1111, stable-diffusion-webui. Main Page[2]
- ↑ https://github.com/w-okada/voice-changer
- ↑ GitHub, voice-changer[3]
